
So you’ve spent the last few months testing and verifying that all your applications will work with macOS Big Sur. Now it’s time to finally roll out the latest version of macOS to your end-users. Great!
As of macOS Sierra, Apple began enforcing the use of the startosinstall binary included in the installer application when triggering an automatic upgrade. In this article, we’ll review the tools we need to use to build our workflow, link you to some existing scripts and perhaps inspire you to build your own! To start, let’s look at the documentation around the startosinstall binary.
startosinstall --usage Arguments --license: prints the user license agreement only. --agreetolicense: agree to the license you printed with --license. --rebootdelay: how long to delay the reboot at the end of preparing. This delay is in seconds and has a maximum of 300 (5 minutes). --pidtosignal: Specify a PID to which to send SIGUSR1 upon completion of the prepare phase. To bypass "rebootdelay" send SIGUSR1 back to startosinstall. --installpackage: the path of a package (built with productbuild(1)) to install after the OS installation is complete; this option can be specified multiple times. --eraseinstall: (Requires APFS) Erase all volumes and install to a new one. Optionally specify the name of the new volume with --newvolumename. --newvolumename: the name of the volume to be created with --eraseinstall. --preservecontainer: preserves other volumes in your APFS container when using --eraseinstall. --forcequitapps: on restart applications are forcefully quit. This is the default if no users are logged in. --usage: prints this message. --user: an admin user to authorize installation. --passprompt: collect a password for authorization with an interactive prompt. --stdinpass: collect a password from stdin without interaction.
This gives us a lot of good information to start with, so let's start building our command out:
‘/Applications/Install macOS Big Sur.app/Contents/Resources/startosinstall’ --agreetolicense --nointeraction --forcequitapps
OK, great! We have our command, now we need to test. If you haven’t noticed already, this command requires that our client computer has the “Install macOS Big Sur.app” in their /Applications folder.
Delivering the macOS Big Sur installer
We have a number of different ways to deliver our macOS installer app:
softwareupdate binary
In macOS Catalina, Apple added the ability to download macOS installer apps by using the softwareupdate binary. If we want to download the latest version of macOS for a client, we can run the command below. To deploy this solution, the command could be built into a script or run in a policy as part of a files & processes payload.
‘/usr/sbin/softwareupdate’ --fetch-full-installer
If you’d like to learn more, you can view the softwareupdate help page by running the ‘/usr/sbin/softwareupdate help’ command. Take particular note of the --full-installer-version command, which allows us to specify which version we wish to download.
/usr/sbin/softwareupdate help usage: softwareupdate [ ...] ** Manage Updates: -l | --list List all appropriate update labels (options: --no-scan, --product-types) -d | --download Download Only -i | --install Install ... specific updates -a | --all All appropriate updates -R | --restart Automatically restart (or shut down) if required to complete installation. -r | --recommended Only recommended updates --list-full-installers List the available macOS Installers --fetch-full-installer Install the latest recommended macOS Installer --full-installer-version The version of macOS to install. Ex: --full-installer-version 10.15 --install-rosetta Install Rosetta 2 --background Trigger a background scan and update operation ** Other Tools: --dump-state Log the internal state of the SU daemon to /var/log/install.log --evaluate-products Evaluate a list of product keys specified by the --products option --history Show the install history. By default, only displays updates installed by softwareupdate. --all Include all processes in history (including App installs) ** Options: --no-scan Do not scan when listing or installing updates (use available updates previously scanned) --product-types Limit a scan to a particular product type only - ignoring all others Ex: --product-types macOS || --product-types macOS,Safari --products A comma-separated (no spaces) list of product keys to operate on. --force Force an operation to complete. Use with --background to trigger a background scan regardless of "Automatically check" pref --agree-to-license Agree to the software license agreement without user interaction. --verbose Enable verbose output --help Print this help
Apps & Books
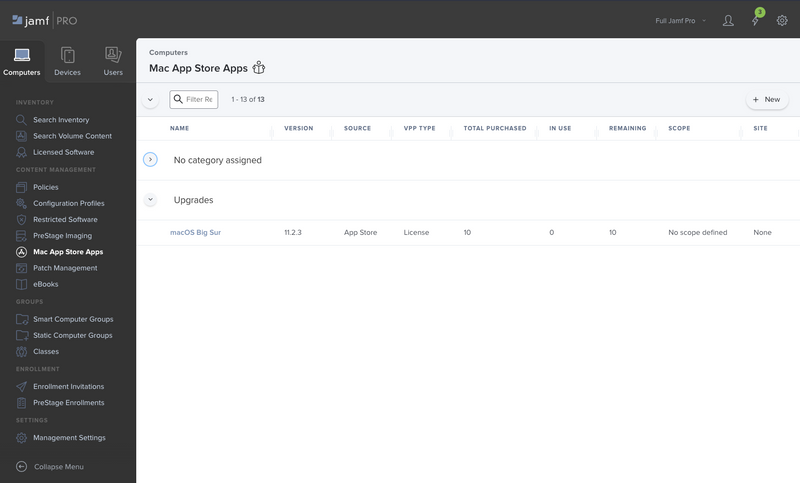
If using Apple Business or School Manager with Jamf Pro, we can deploy the macOS Big Sur installer using the Mac App Store Apps functionality. Simply get some licenses from the Apps & Books menu in Apple Business or School Manager and then use Managed Distribution to deploy the app to your clients.
Packaging
The macOS Big Sur installer is pretty big this time around at 12GB. Composer only supports building PKGs that contain files no larger than 8GB; as such, we will have to build as a DMG.
Alternatively, we could use https://github.com/scriptingosx/fetch-installer-pkg which will fetch the installer app for us and build a package all in one.
Checking eligibility
It’s a good idea to ensure that we only deploy the installer to eligible computers. To this end, we can use https://github.com/laurentpertois/BigSur-Compatibility-Checker. This script will check that there is sufficient space and memory and that the computer meets the minimum requirements for macOS Big Sur. It will be used to create an extension attribute, from which a smart computer group can be built as a target to scope our workflow to.
Criteria: Big Sur Compatible (the name of our Extension Attribute) Operator: is Value: True
In preparation for later, we should also create a smart computer group to identify computers that have the Install macOS Big Sur.app installed. This will be used as a target for scoping our self service policy to install macOS Big Sur.
Criteria: Application title Operator: is Value: Install macOS Big Sur.app
Trying it out
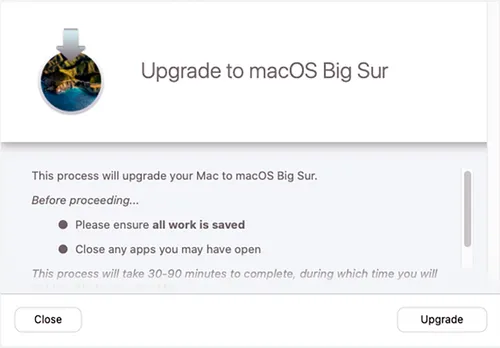
At this point, you could simply build a policy to be made available in Self Service, which will run the ‘startosinstall’ command we built earlier.
‘/Applications/Install macOS Big Sur.app/Contents/Resources/startosinstall’ --agreetolicense --nointeraction --forcequitapps
This, however, does not provide a very good end-user experience. The user will be left for some time with no feedback about what’s happening before the computer reboots.
End-user messaging
Let’s fix this by making it more appealing to users with Jamf Helper. If you are not familiar with Jamf Helper, it is a handy tool you can use to display a basic GUI to the end user, all from a bash script. Here is a quick look at the different options that are available with Jamf Helper.
'/Library/Application Support/JAMF/bin/jamfHelper.app/Contents/MacOS/jamfHelper' -help
JAMF Helper Help Page
Usage: jamfHelper -windowType [-windowPostion] [-title] [-heading] [-description] [-icon] [-button1] [-button2] [-defaultButton] [-cancelButton] [-showDelayOptions] [-alignDescription] [-alignHeading] [-alignCountdown] [-timeout] [-countdown] [-iconSize] [-lockHUD] [-fullScreenIcon] -windowType [hud | utility | fs] hud: creates an Apple "Heads Up Display" style window utility: creates an Apple "Utility" style window fs: creates a full screen window the restricts all user input WARNING: Remote access must be used to unlock machines in this mode -windowPosition [ul | ll | ur | lr] Positions window in the upper right, upper left, lower right or lower left of the user's screen If no input is given, the window defaults to the center of the screen -title "string" Sets the window's title to the specified string -heading "string" Sets the heading of the window to the specified string -description "string" Sets the main contents of the window to the specified string -icon path Sets the windows image filed to the image located at the specified path -button1 "string" Creates a button with the specified label -button2 "string" Creates a second button with the specified label -defaultButton [1 | 2] Sets the default button of the window to the specified button. The Default Button will respond to "return" -cancelButton [1 | 2] Sets the cancel button of the window to the specified button. The Cancel Button will respond to "escape" -showDelayOptions "int, int, int,..." Enables the "Delay Options Mode". The window will display a dropdown with the values passed through the string -alignDescription [right | left | center | justified | natural] Aligns the description to the specified alignment -alignHeading [right | left | center | justified | natural] Aligns the heading to the specified alignment -alignCountdown [right | left | center | justified | natural] Aligns the countdown to the specified alignment -timeout int Causes the window to timeout after the specified amount of seconds Note: The timeout will cause the default button, button 1 or button 2 to be selected (in that order) -countdown Displays a string notifying the user when the window will time out -iconSize pixels Changes the image frame to the specified pixel size -lockHUD Removes the ability to exit the HUD by selecting the close button -fullScreenIcon Scales the "icon" to the full size of the window Note: Only available in full screen mode Return Values: The JAMF Helper will print the following return values to stdout... 0 - Button 1 was clicked 1 - The Jamf Helper was unable to launch 2 - Button 2 was clicked XX1 - Button 1 was clicked with a value of XX seconds selected in the drop-down XX2 - Button 2 was clicked with a value of XX seconds selected in the drop-down 239 - The exit button was clicked 243 - The window timed-out with no buttons on the screen 250 - Bad "-windowType" 255 - No "-windowType”
Putting it all together
Lots of information there, but since it’s already on the system, we can go ahead and use these to let the end-user know what’s going on. Now, besides just adding the Jamf Helper window, we can go ahead and use the --pidtosignal switch to close Jamf Helper cleanly so we don't have any possible conflicts during reboot.
Here is how it will look to your end-user:
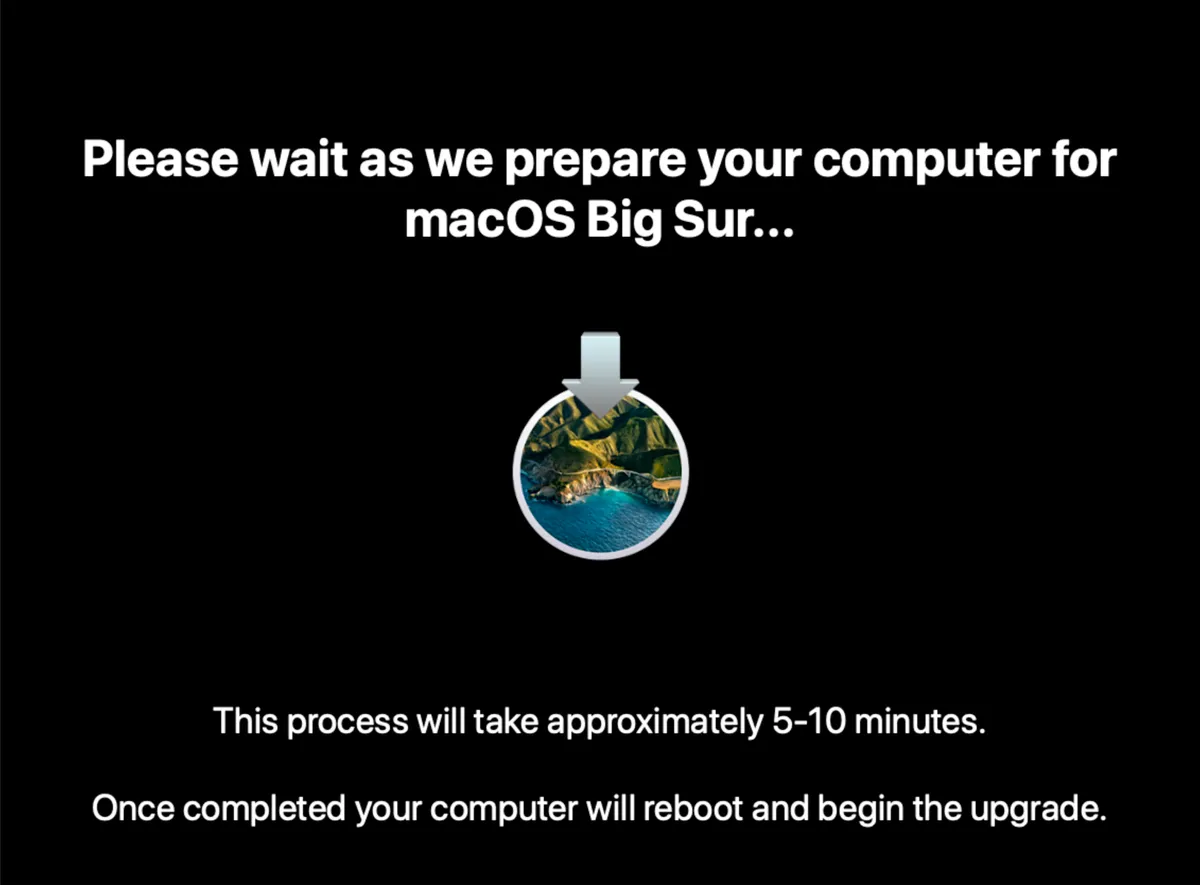
Now we have Jamf Helper launching a full-screen window to let the user know we are preparing their system for upgrading to macOS Big Sur. Once the startosinstall binary is done doing its thing, it quietly closes Jamf Helper and lets the computer reboot cleanly — all the things we want! You'll also notice now that since we are adhering to Apple's guidelines for conducting an upgrade, the FileVault Authenticated reboot worked beautifully and loaded directly into the macOS installer volume, beginning the upgrade process without asking the user for anything.
Last but not least, don’t forget to clean up your self service descriptions and make them informative to your end-users. Remember to scope it to the smart computer group we created earlier to identify computers with Install macOS Big Sur.app installed.
Now you have a basic macOS upgrade script that should help you get the project rolling and wrapped up. But, if you're looking for a little more, maybe some checks to ensure the Macs are plugged into power and have enough free space for the upgrade, head over to Josh’s GitHub page for a fully working and tested workflow.
Subscribe to the Jamf Blog
Have market trends, Apple updates and Jamf news delivered directly to your inbox.
To learn more about how we collect, use, disclose, transfer, and store your information, please visit our Privacy Policy.