
This step-by-step guide shows how to display Jamf Pro Webhooks in a Microsoft Teams channel when, for example, a new Apple device is enrolled in Jamf Pro, a device has been added to DEP, or a SmartGroup is changed.
PowerAutomate is needed for this as Teams does not accept the JSON format sent out by Jamf Pro. We will need to translate/reformat the message and send it out to Microsoft Teams.
Many enterprise and SMB companies use Azure. Most are using Azure AD, but they may also be using other functionalities. These companies often manage users in Azure AD, which requires an E3 license, which also includes Microsoft Teams.
As an administrator it can be very helpful to receive notifications from critical systems in Microsoft Teams as soon as action needs to be taken, or in a channel for informative notifications. Because the E3/E5 license bundles often include Microsoft PowerAutomate, we can combine this with the Webhooks of Jamf Pro in order to receive notifications in Microsoft Teams.
Requirements
Before you begin, make sure you meet the requirements below.
- You have access to Jamf Pro and the privileges to Create/Update Webhooks
- If Jamf Pro is on-premise/private cloud hosted, then outbound HTTP traffic needs to be allowed to *.microsoft.com and *logic.azure.com
- Access to Microsoft PowerAutomate with a valid or trial license
- Access to Microsoft Teams with an existing channel or one you just created
Instructions
Step by Step guide:
- Create Flow in Microsoft PowerAutomate
- Create Webhook in Jamf Pro
- Result
- Troubleshooting
You do not have to stick with the ComputerAdded idea, be creative!
1. Create Flow in Microsoft PowerAutomate
Below is a step-by-step guide to create a Microsoft PowerAutomate Flow.
Step 1:
Navigate to the Power Automate Microsoft Power Platform. Sign in with your corporate credentials and the account that has a valid/trial Power Automate license.
Step 2:
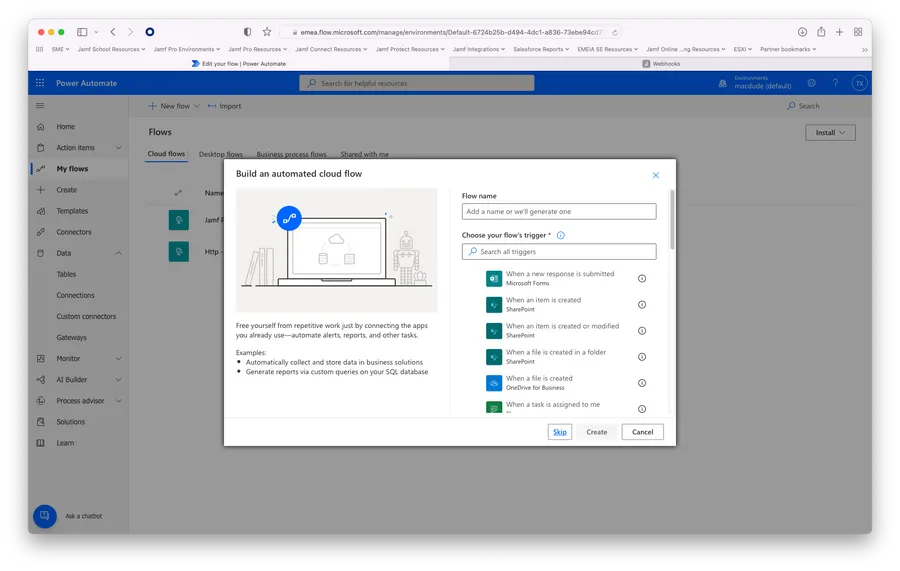
Select My Flows from the lefthand menu and the + to create a new automated cloud flow.
Step 3:
Give your flow a name. Search for flow trigger when an HTTP Request is received, and select it as trigger.
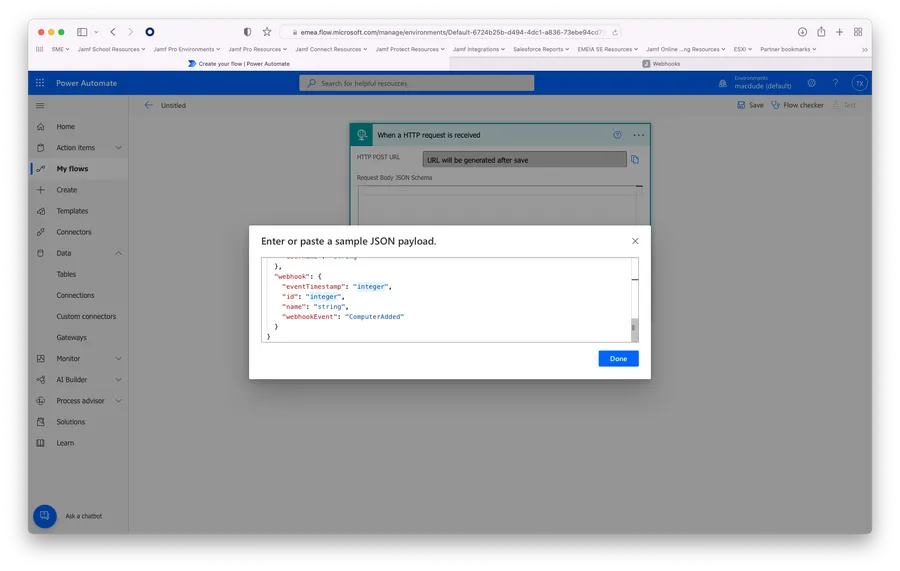
Step 4:
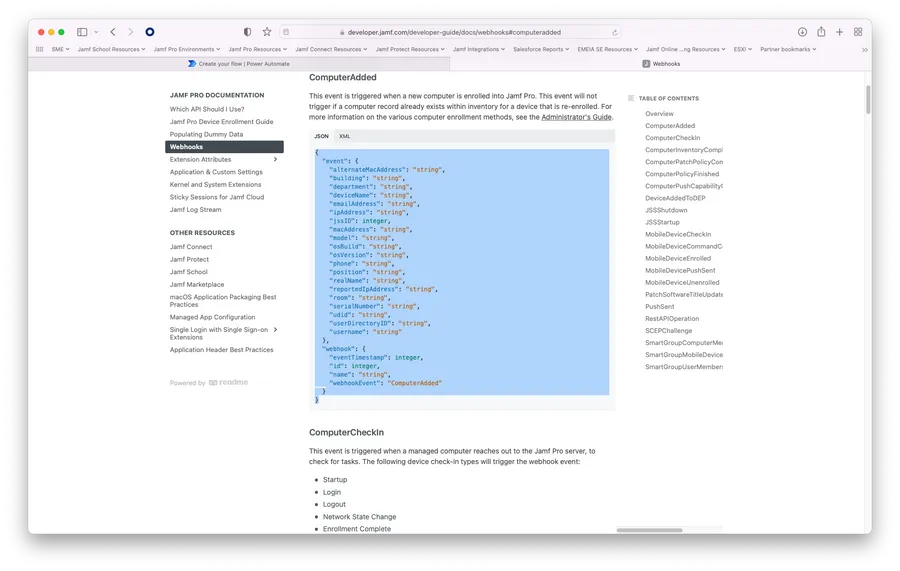
Now we need to generate a JSON template schema. Select Use sample payload to generate schema and copy/paste the values from the Webhooks documentation.
*If errors occur for your integer, you’ll need to include them in quotes: "integer."
Step 5:
Select + to add a new step. Search for Post adaptive card in a chat or channel and select.
Choose the how and where you want to have the Adaptive Card posted.
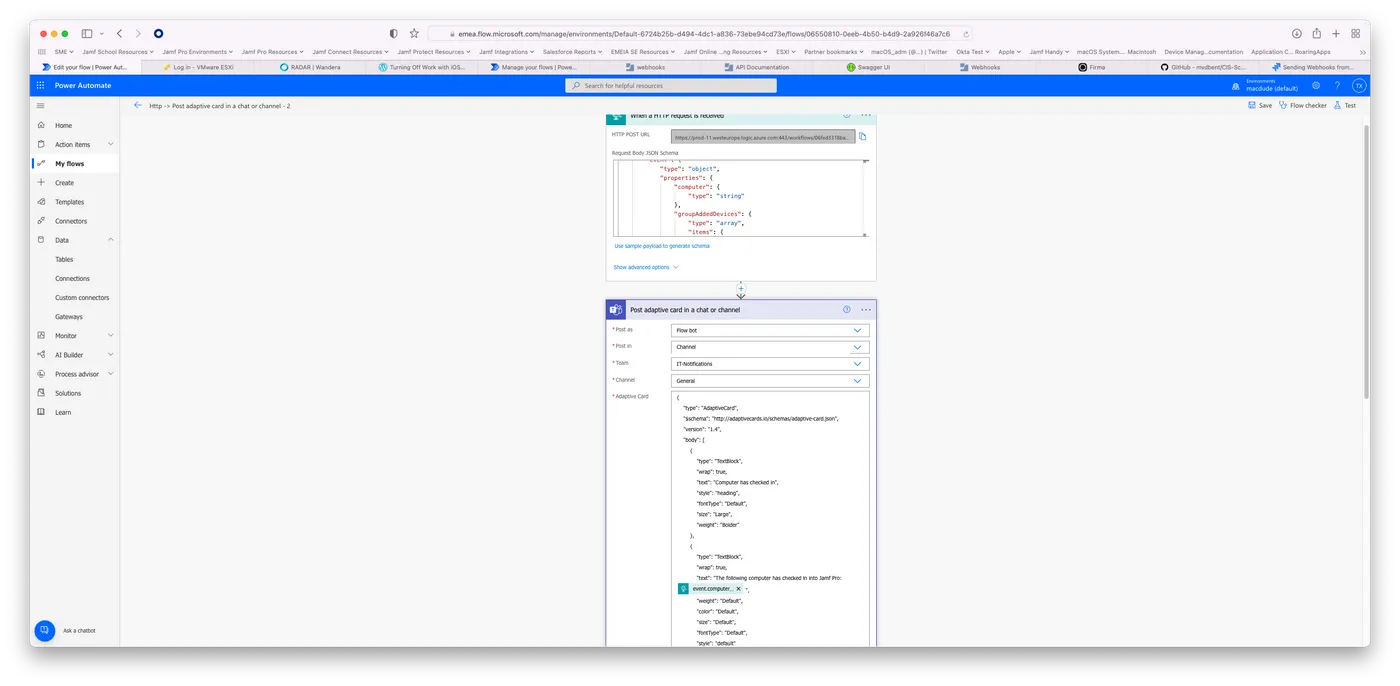
Step 6:
Paste the following example template In the *Adaptive Card.*
*There are many ways to design your own Adaptive Cards, feel free to modify to your needs.
Step 7:
Save.
Create Webhook in Jamf Pro
Step 1.
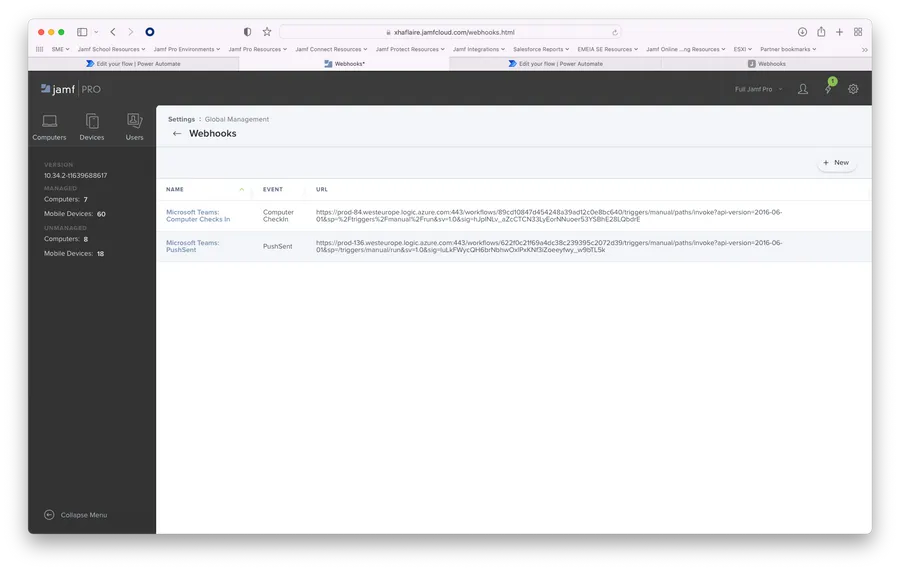
Navigate to your Jamf Pro instance and go to Settings → Global Management → Webhooks → Click +New
Step 2:
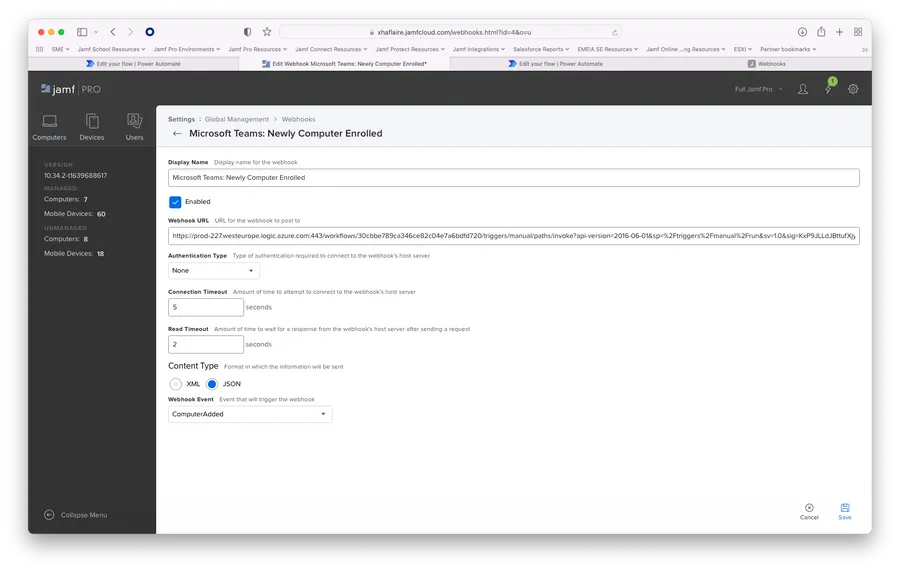
Enter a Display Name for the Webhook.
Copy and paste the URL from Microsoft PowerAutomate into the field, but before we do that we need to escape all characters in the link.
The URI Microsoft Flow provides is already URL encoded, so we have to switch the %2F to "/" since that is the representation of it.
Switch Content Type to JSON.
Select Computer Added as Webhook Event in this example .
Step 3.
Save.
Result
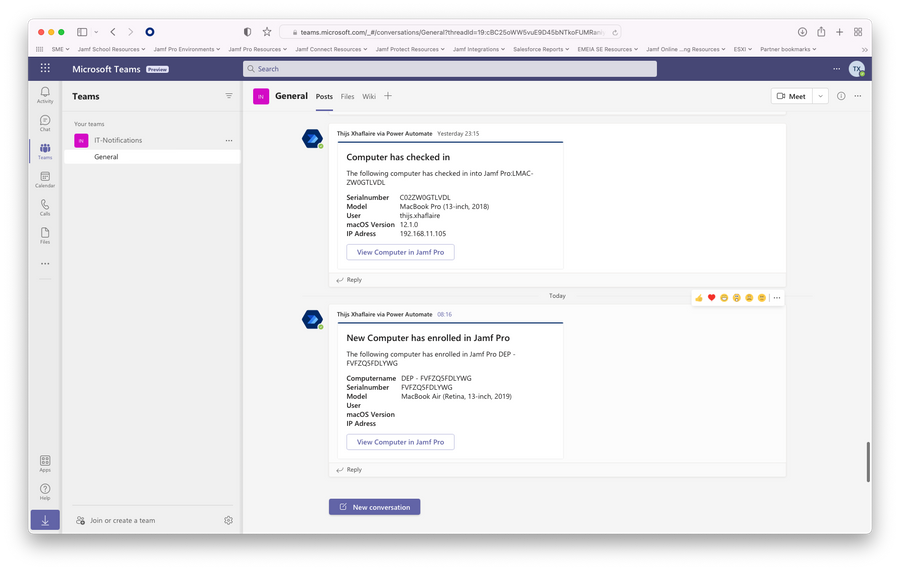
The expected result will be that when a Computer enrolls into Jamf Pro, a Webhook sends information to Microsoft PowerAutomate, which is translated and sent to a chosen Microsoft Teams Channel.
Troubleshooting
Problem:
PowerAutomate does not receive any data

Solution:
Try sending your Webhooks to an endpoint you get from Webhook Tester and see if data appears in the WebHook Tester.
If so then you know Jamf Pro - WebHooks is working as expected.
Subscribe to the Jamf Blog
Have market trends, Apple updates and Jamf news delivered directly to your inbox.
To learn more about how we collect, use, disclose, transfer, and store your information, please visit our Privacy Policy.