
Regularly using command line tools builds mental muscle memory. They get easier to use the more you use them. But, you never develop that muscle memory for little used tools like openssl and keytool for helping generate Secure Sockets Layer (SSL) certificates for your Jamf Software Server (JSS) every 1-3 years.
Keychain Access on macOS has all you need to generate the files to request signed certificates and bundle everything together for upload to a JSS. Compared to command line tools, its GUI makes the process much easier.
Whether using Keychain Access or the command line, generating an SSL certificate for a JSS requires these steps:
- Create a key pair.
- Generate a certificate signing request (CSR) from the key pair.
- Have a third-party certificate authority (CA) sign the CSR.
- Bundle the signed certificate, any intermediate certificates and private key together.
- Upload the bundle to the JSS.
Steps 1-2
Keychain Access takes care of creating a key pair and using it to generate the CSR at the same time.
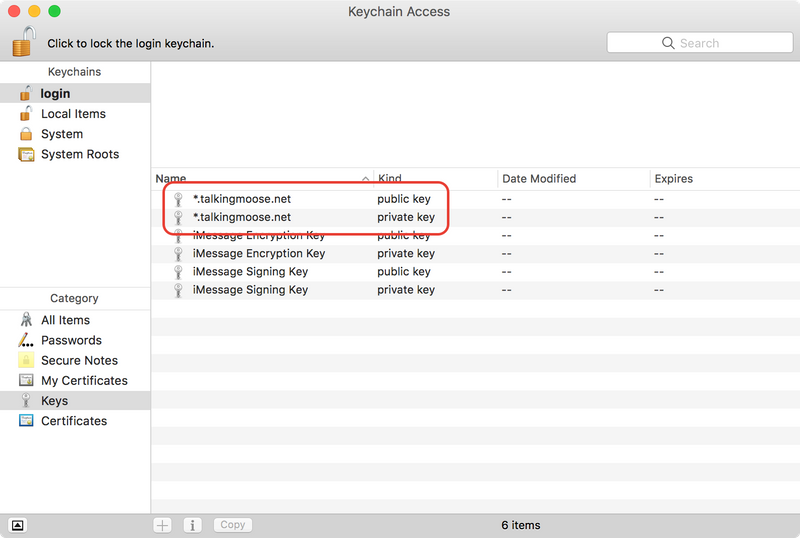
a) Launch Keychain Access and select the login keychain on the left and choose the Keys category. This lets you easily see what’s about to happen. (Note the number of items in the status bar below.)
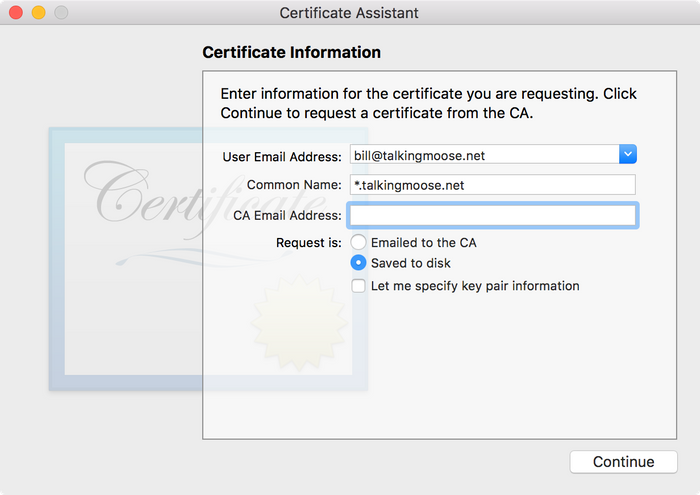
b) Choose Keychain Access > Certificate Assistant > Request a Certificate from a Certificate Authority. Enter an email address and enter the fully qualified domain name of your JSS. Use an asterisk instead of the hostname if you’re requesting a wildcard certificate. Click the Continue button and save the CSR file to your desktop.
c) After saving the CSR file, you should notice two new public and private keys for your JSS in Keychain Access. (The status bar at the bottom should also show two more items than earlier.)
Step 3
Now, you’re ready to have a third-party CA sign the CSR. If using a CA for the first time, it’ll require completing some additional verification steps to prove domain and organization ownership.
For this example, DigiCert will serve as the CA.
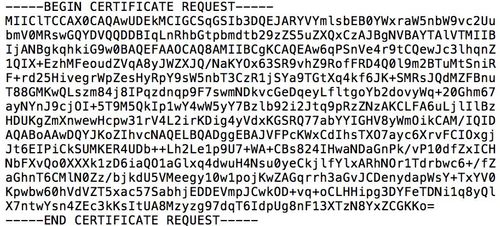
a) Open the newly created CSR file on your desktop with a text editor such as TextEdit. Copy the entire blob of text to the Clipboard, including the first and last lines confirming this is a certificate request.
b) Log in to the CA’s website and start the process to order a new certificate.
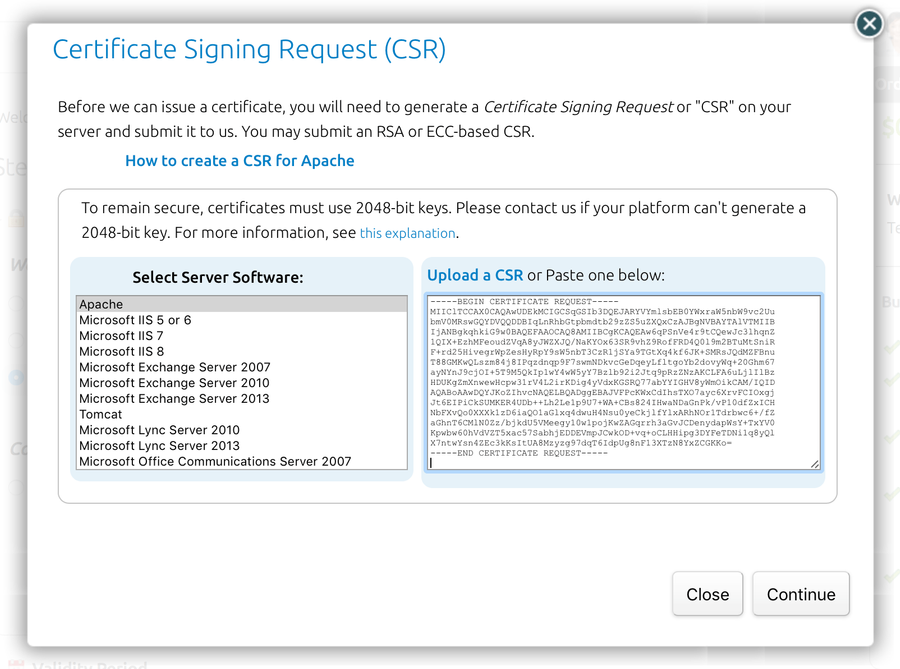
c) When prompted to submit your CSR, paste the text into the form or upload your CSR file. If prompted to select a server type, just use Apache. (This information isn’t critical.)
d) Complete the order and then wait for notification that the signed certificate is ready for download. This may take several minutes.
e) When retrieving the signed certificate, choose the option to let you download the individual certificates in a zipped file. The archive is going to contain a root certificate, one or more intermediate certificates and your signed JSS certificate. It may contain other text files, but only the certificates are important.
Together, they create a certificate chain: the root certificate signs the intermediate certificate and the intermediate certificate signs the JSS certificate.

Step 4
Before adding the signed certificate to the JSS, you need to bundle it with any accompanying intermediate certificates and the private key generated in Keychain Access.
a) Drag any intermediate certificates and your signed JSS certificate into the Keychain Access window. (Note their icons display with a blue border.) When prompted, choose to add them to the login keychain. You do not need to import the root certificate (gold border). Apple takes care of installing the root certificates for common CAs on every Mac.
b) In Keychain Access, select the login keychain on the left and select the All Items category. Click the Date Modified column header to sort the keys and newly added certificates to the top.
c) Holding the Command key, select the JSS certificate, any intermediate certificates and the private key. Right-click any one of the items and choose Export from the pop-up menu. Save the new file to the desktop using the Personal Information Exchange (.p12) file format.
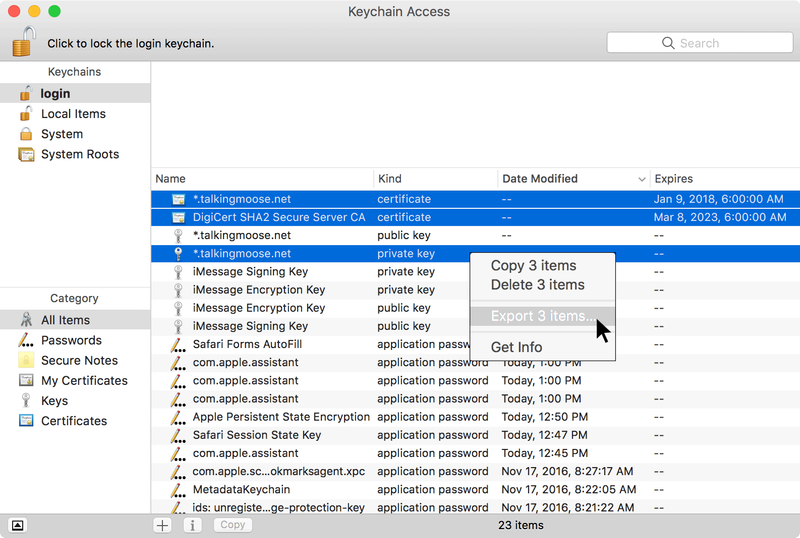
d) When prompted, enter a new password to protect the file and then allow export from Keychain Access.
Step 5
After creating the p12 certificate bundle, it’s ready to upload and install in the JSS.
a) Log in to the JSS and choose JSS Settings > System Settings > Apache Tomcat settings. Click the Edit button.
b) Select “Change the SSL certificate used for HTTPS” and click the Next button.
c) Select “Upload an existing SSL certificate” and click the Next button.
d) Choose the p12 certificate bundle and then enter its password to allow your JSS to read and install the bundle.
e) Restart the Tomcat service on your server to activate the new certificate.
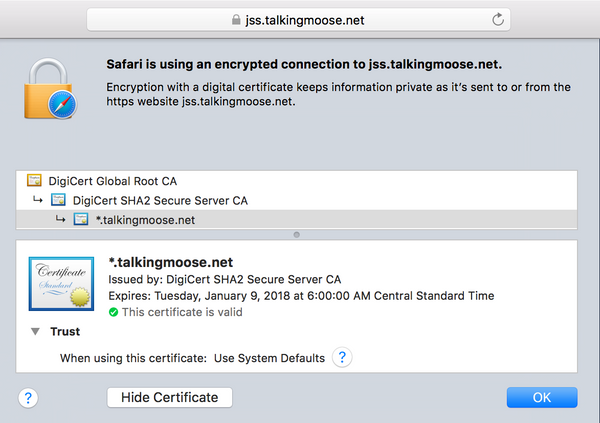
After restarting Tomcat, navigate to the JSS in a browser. Most browsers offer a method to inspect SSL certificates, usually by clicking a lock icon near the URL.
The certificate should show the full certificate chain starting with the CA’s root certificate, followed by any intermediate certificates and ending with your SSL certificate. Your browser should also confirm the certificate is valid or trusted.
If using a wildcard certificate, the same p12 certificate bundle should work for any other web server or network service using SSL with the same domain name. This method for creating the p12 certificate bundle will also work for some other network services using SSL, including Active Directory.
Subscribe to the Jamf Blog
Have market trends, Apple updates and Jamf news delivered directly to your inbox.
To learn more about how we collect, use, disclose, transfer, and store your information, please visit our Privacy Policy.